- Home »
- Our Products »
- Micro Hardness Testing »
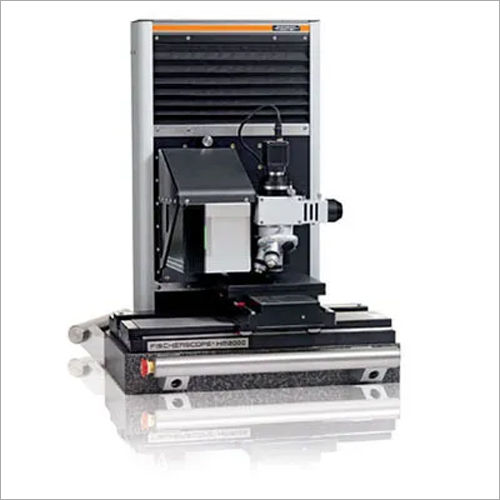
- Micro Hardness Testing HM 2000
Micro Hardness Testing HM 2000
Martens hardness testing: fischerscope HM2000 is used for for bulk material and coatings thicker than 1 m (0.04 mils). It is basically automated nanoindentation measuring system with measuring head HT2000. This martens hardness testing: fischerscope HM2000 is designed precisely for instrumented indentation test method and checked as per ISO 14577 standards. Moreover, it is ideally suitable for quality assurance, measurements in development, incoming inspection and process control.
Design:
- The measuring head of Fischerscope HM2000 contains the test load generating unit, the indenter and the position measurement unit.
- It modular design allows future upgradation.
Features:
- Ample load and depth range; can be used for a broad range of applications from polymeric automotive clear coats to cermaic diamond-like carbon coatings
- Motorized z-axis and fully automated surface detection for higher productivity
- Enhanced high resolution optical system with autofocus and multiple objective turret
- Custom granite structure for enhanced frame stiffness and low noise floor
- Measure on smallest structures, cross-sections with high precision programable X/Y-table
- Minimal sample preparation due to large working area and open layou
- Measurement of dark surfaces without sample pretreatment
- Vickers, Berkovich or spherical indentors are available
- Optional: active damping table to reduce influence of vibrations
- Easy operation through the customizable WIN-HCU Software
Typical areas of application are:
- Paint, synthetic or hard material coatings (PVD, CVD)
- Electroplated coatings (decorative, functional)
- Materials used specifically in medical technology applications
- Electronic components, bond wires, etc
- Plasma-applied coating systems
General Specification
- Intended use:Nanoindentation on lacquer coatings, electroplated coatings, hard
material coatings, polymers, metals, glasses and much more - Design:Bench top unit with PC, measuring head, positioning device made of natural hard stone, programmable XY-stage, motorised z-axis, joystick for controlling the XY-stage and Z-axis.
- Damper system:6 damper pads
Measuring head
- Hardness measurement range:0.001 -120 000 N/mm2: near diamond hardness
- Test load range:0.1 -2000 mN
- Load resolution:150 nN
- Distance resolution: 10 pm
- Noise floor: < 175 pm
Microscope
- Objective:4x, 20x and 40x
- Video picture (field of vision):1600 m x 1200 m, 320 m x 240 m, 160 m x 120 m
Indenters
- Design:Standard: Vickers
Optional: Berkovich, Knoop, hard metal spheres 0.4 mm or 2.0 mm,
ÆÃÅ 2.0 mm, special shapes on request - Approach speed of the indenter 0.7 m/sec
- Maximum indentation depth: 150 m, special design up to 500 m.
Sample Stage
- Design:Programmable XY-stage
- Sample placement area:180 mm x 150 mm
- Maximum Travel:170 mm x 140 mm
- Repeatability precision XY: 2 m (unidirectional)
- Max. specimen height:130 mm
- Max. specimen weight:2 kg
Electrical Data
- Main voltage, mains frequency:100 to 240 V ±10 % 47 - 63 Hz, 360 VA
- Power consumption:max. 120 W (without evaluation PC)
- Protection class:IP40
Dimensions
- External dimensions:Width x depth x height [mm]: 630 mm x 650 mm x 610 mm
- Weight:120 kg
Environmental Conditions
- Operating temperature:Climatic chamber class 2
10 â°C -40 °C / 50 °F - 104 °F - Storage temperature:0 °C - 50 °C / 32 °F - 122 °F
- Admissible air humidity:95 %, non-condensing
Evaluation Unit
- Software:WIN-HCU
- Operating system:Windows
Standards
- CE approval:EN 61010
- Standards:DIN EN ISO 14577, ASTM E 2546
Product details
| Approach speed of the indenter | 0.1 to 1/4m/s |
| Brand | Fischer |
| Test load range | 0.005 to 500 mN |
| Objective | 4x,20x and 40x |
| Load resolution | 100 nN |
| Distance resolution | 40 pm |


