- Home »
- Our Products »
- Pocket Gauges »
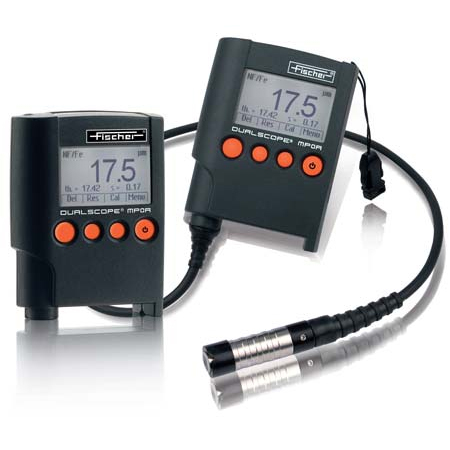
- Thickness Tester MP0R-FP
Thickness Tester MP0R-FP
Features:
Coating Thickness Pocket Gauge with permanently attached cable probe for diverse specimen's geometries
Outstanding repeatability precision
Acoustical as well as optical signal of a dimension capture
Tolerance limits for lower and upper limit values
Memory for max. 10.000 readings
Measuring mode according to SSPC-PA2 of the "Society for Protective Coatings"
Typical fields of application of Thickness Tester MP0R FP:
Shipbuilding
Protective coatings
Building maintenance
Gauge Types:
PERMASCOPE®MP0R-FP
DUALSCOPE® MP0R-FP
DUALSCOPE® MP0RH-FP
Evaluation
Statistics:Display of standard deviation, mean value, MAX, MIN, and number of capacities per block
PC software: PC software FISCHER DataCenter with the given below functionality:
included in Transferring and archiving measurement data
the scope of supply: graphical and statistical evaluations, easy creation as well as printing of inspection reports.
Measurement Functions
Block size:Adjustable between 20 and 2 single readings per block
Tolerance limits:Adjustable as per the measuring mode
Offset value:In the standard mode. The freely adjustable offset assessment is deducted automatically from the measured value to obtain the thickness of the top coating in case of knowing the value of interim coating.
Units of measurement:Selectable m or mils
Continuous display mode:Measurement in "continuous display mode" for constant sampling of the surfaces like in the production of tanks and containers.
Normalization:Adaptation to the substrate materials and the shape of the specimens.
Calibration:Factory calibration
Thickness Testers is factory calibrated at numerous reference points with the utmost care to make sure the maximum possible degree of trueness.
Corrective calibration (Adjustment)
Adaptation to the substrate material as well as the shape of the specimen and to a thickness assessment using a calibration foil.
Simple Calibration
Adaption to the coating along with substrate material in a single step using a coated reference part along with a coating thickness more than 200 m (7.87 inches). Nevertheless, this calibration offers only a lesser accuracy as specified in the sections Trueness and Repeatability Precision.
General Features
Measuring method:Magnetic induction method (ISO 2178, ASTM D7091, Measurement of
non-magnetic coatings on magnetic substrates)
Probe:Probe tip radius: 2 mm (78 mils); Probe tip material: Hard metal
Data memory:Max. 10,000 individual readings; the contents of the memory is retained even without batteries
Measuring frequency:More than 70 measurements per minute
Measurement acquisition:Automatic placement of the probe; sign of the measurement with a beep visually with a green lit LED
Display: Graphic display, besides the measurement reading the mean value as well as the standard deviation or the number measurement reading can also be shown. LCD display on the top side of the device, e.g., for reading the dimension value for measurement overhead
Display limit value violation: Acoustically through 2 short beeps with a red lit LED
Languages: Different display languages from German, English to other European and Asian languages
USB port:2.0 compatible, mini type B socket, for connecting a PC
Data transfer:Single readings, mean values, group separator
Admissible ambient 0 .... +40oC (+32 ... +104oF)
temperature range during operation:
Weight (incl. batteries):MP0R: 137 g (4.8 oz) ; MP0R-FP: 184 g (6.5 oz)
Power supply:2 Batteries, LR6, AA, 1.5 V
Product details
| Block size | Adjustable between 2 & 20 single readings per block |
| Model Name / Number | MP0 Series |
| Measuring Range | 0 to 2500 um |
| Brand | Fischer |
| USB port | 2.0 compatible, mini type B socket, for connecting a PC |
| Data transfer | Single readings, mean values, group separator |


